Spacemesh: Smeshing with SMAPP
So you have decided to join Spacemesh, huh?
That’s wonderful to hear!
But you need some guidance?
No problem, I’m here to help! Like many other smeshers waiting for you to join Spacemesh on Discord!
This step-by-step guide will teach you how to smesh.
Ready? Let’s get started!
If you are not convinced yet and you want to know more about Spacemesh, feel free to read my article that gives a brief introduction about it, “Spacemesh: Cryptocurrency for the People”.
Prerequisites
The requirements to join the Spacemesh network are minimal:
- A modern-ish computer, any computer built in the last 8 years should be okay
- At least 256 GiB of free space available, permanently committed to Spacemesh
- Just for one time: a gaming GPU, low-end is okay but high-end will be faster
Windows reports sizes in GiB, but SSD producers use GB, keep this in mind.
1 GB = 1,000 MB = 1,000,000,000 Bytes
1 GiB = 1,024 MiB = 1,073,741,824 Bytes
If you don’t have a gaming GPU, you can also ask a friend to lend you their gaming computer for a while, I have also written a step-by-step guide to do smeshing from a friend’s computer.
If you don’t have a gaming GPU and you don’t have any friends with a gaming GPU, you can also do it with a CPU, just keep following this guide, but be warned: it might take a long time (up to a few days) and will end up wasting few KWh in electricity. If you have means to do it with a GPU you really should, it’s better for the environment and takes much less time; and remember, it’s a one-time operation.
Installing SMAPP
You can download the latest version of SMAPP from the Spacemesh website.

 After visiting the Spacemesh website, click the “Join the Network” button.

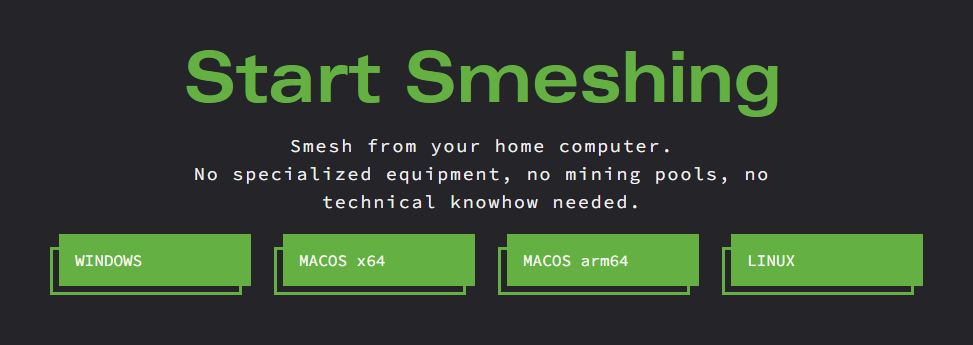 Then, click your operating system’s button.
Run the setup to install SMAPP, you can leave all options to the default values.
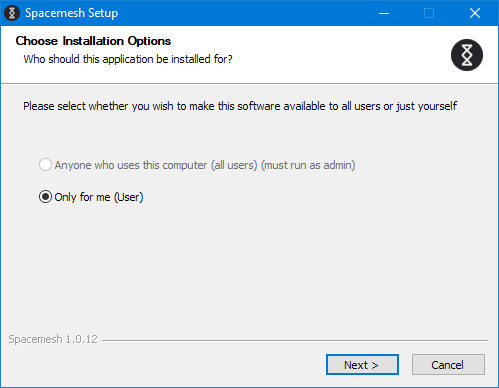 Install only for your user.
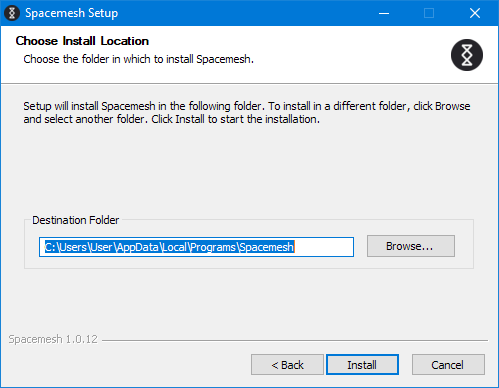 Leave the default installation path.
 Click “Finish” to start SMAPP.
Creating a Wallet
Once SMAPP is configured, it’s time to create a wallet. This is where your coins will be stored.
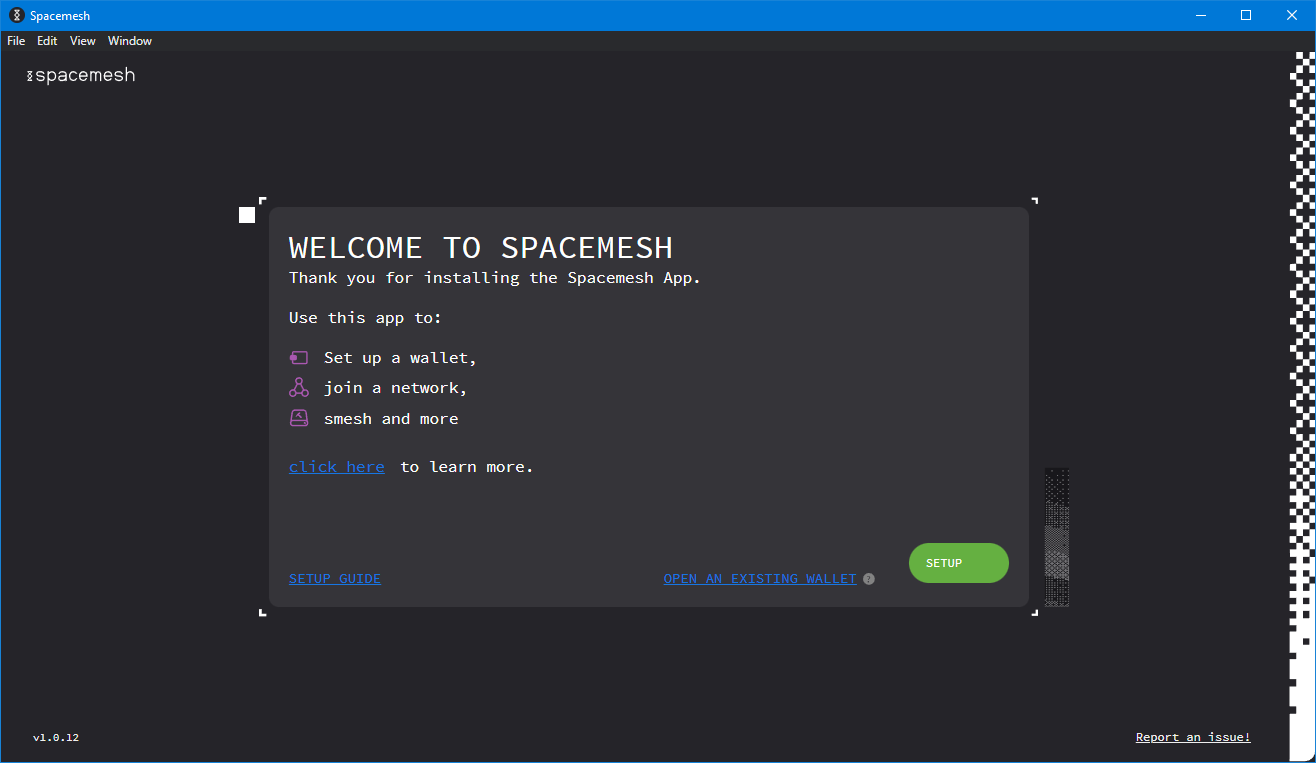 Click “Setup” to start the SMAPP setup.
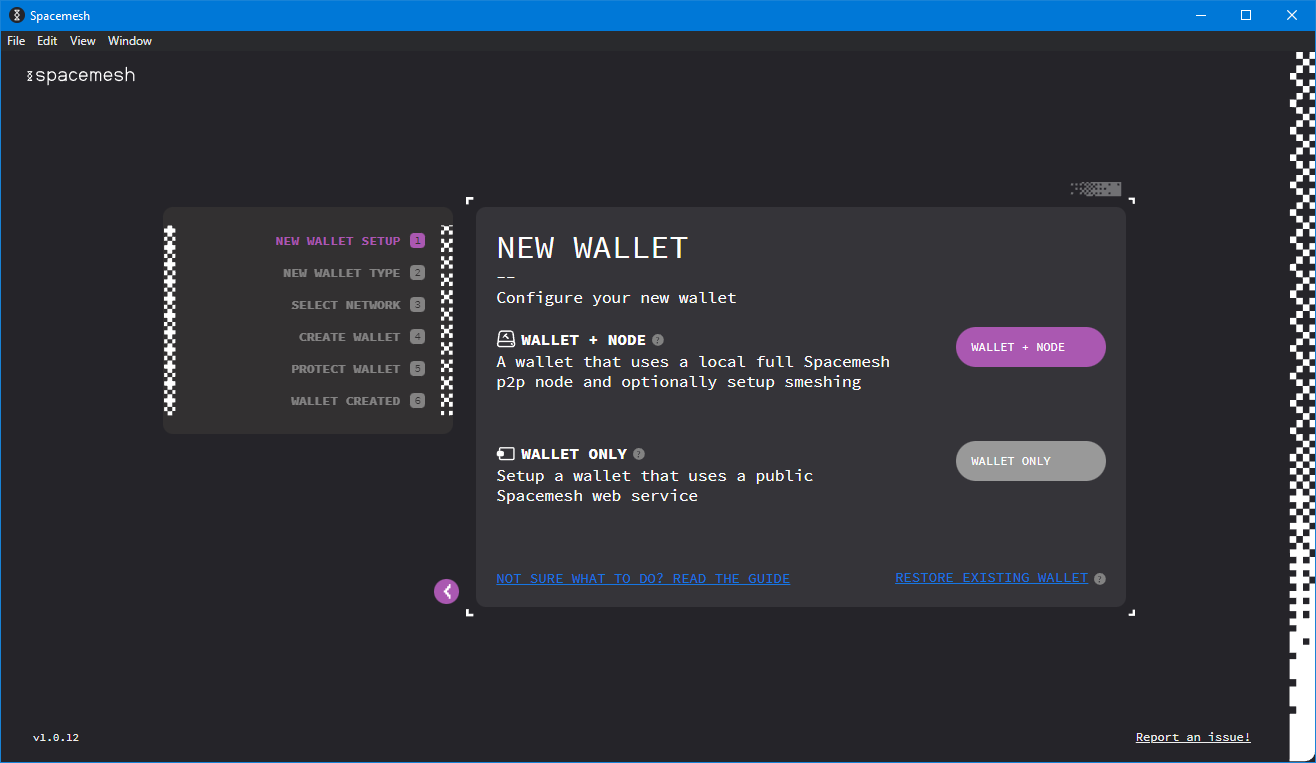 Click “Wallet + Node” to create a new wallet, and a node to start smeshing.
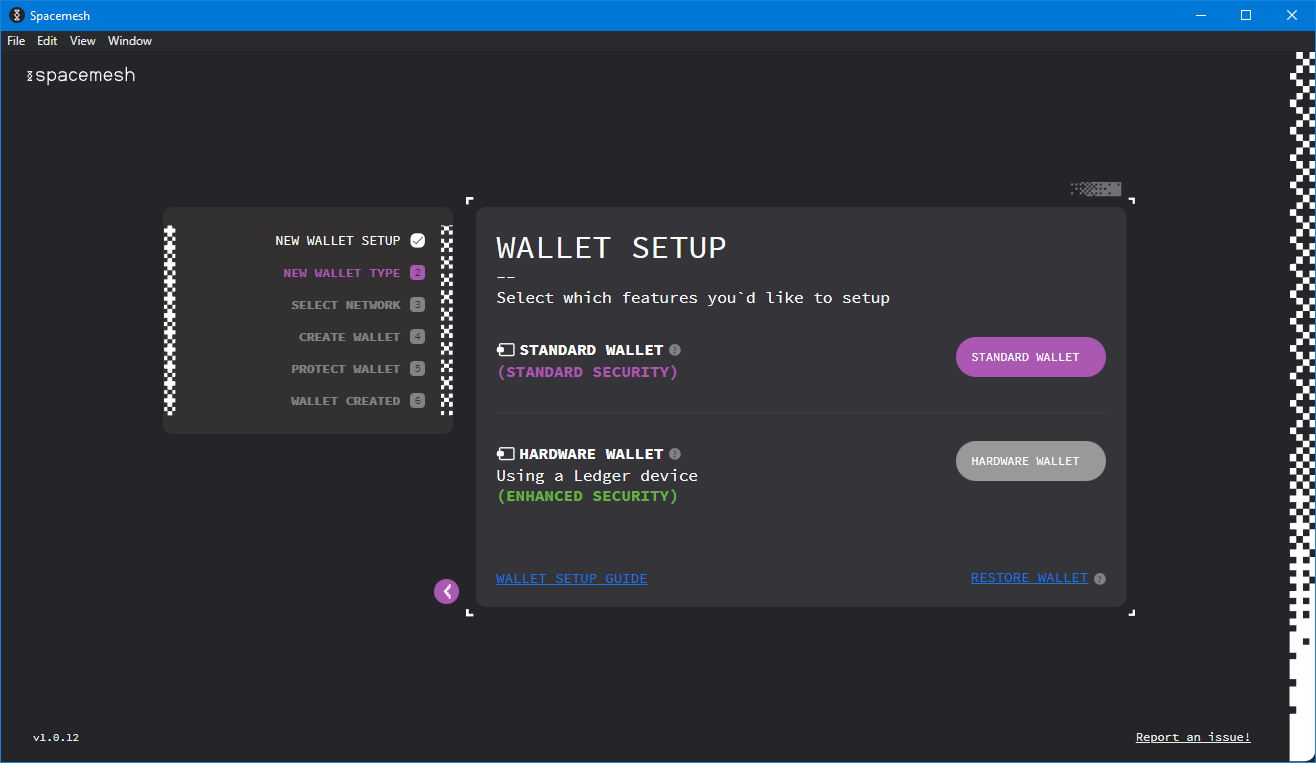 Unless you have a hardware wallet, click “Standard Wallet”.
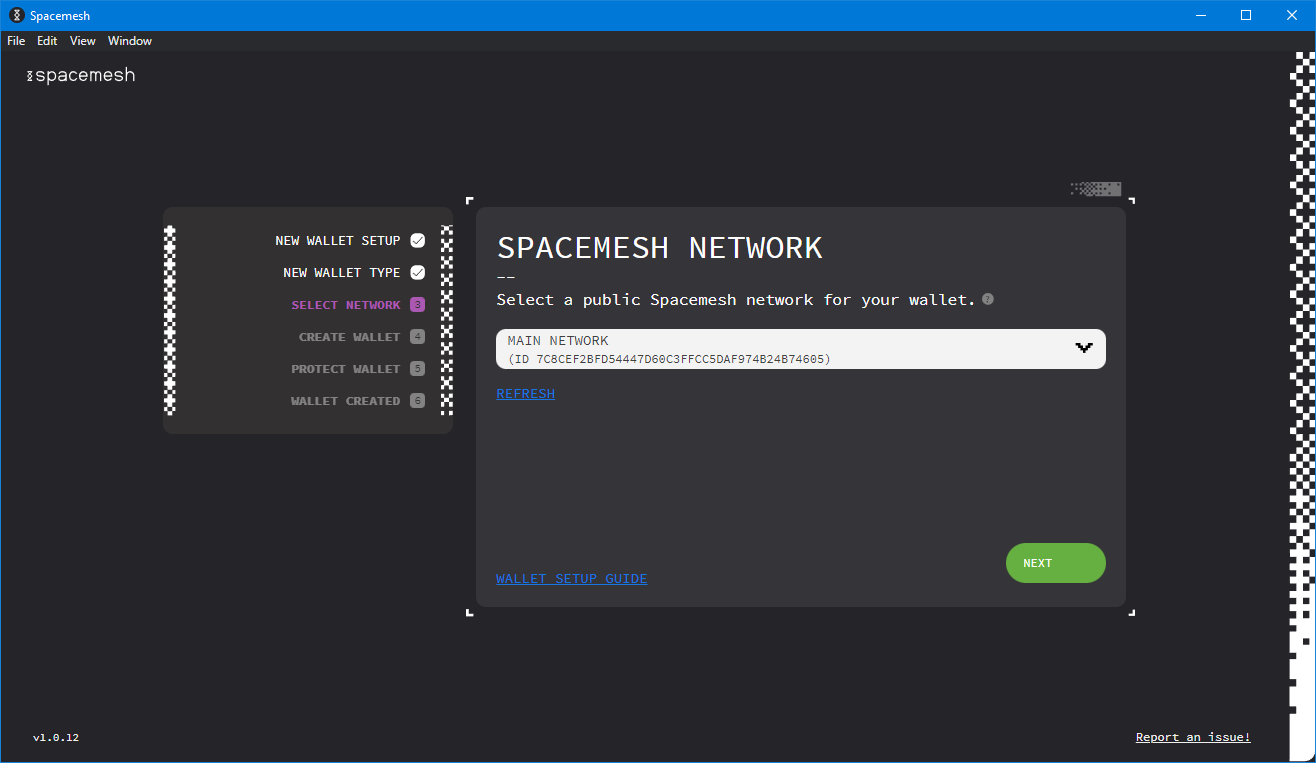 This screen allows you to switch to a test network; don’t do it, just click “Next”.
Password
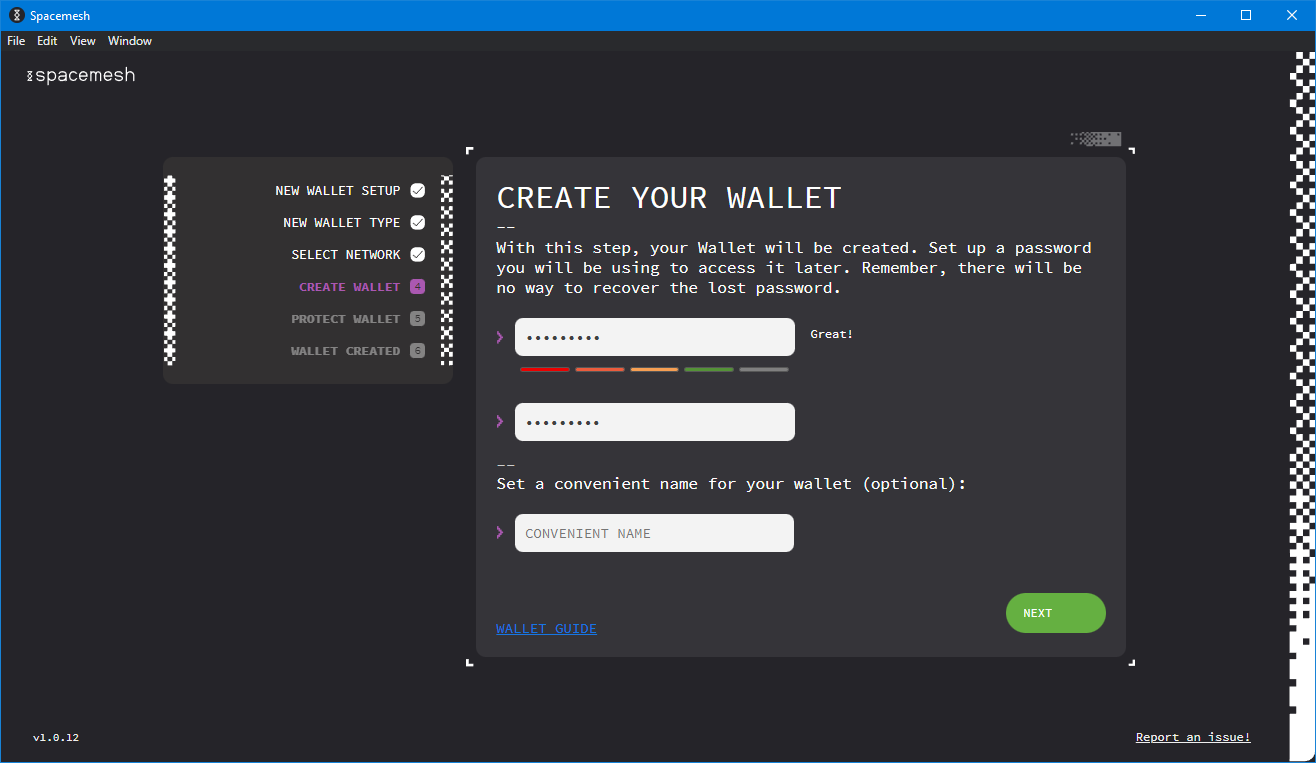 It’s now time to pick a password.
Please, please, please take note of this password. Write it somewhere in multiple copies, get it tattooed on your skin, or just somehow make it absolutely sure that you will never forget it. If you lose your password you will lose your wallet and all the coins that it contains! Please, do everything you can not to lose your password!
And also, you should not reveal your password to anyone you don’t absolutely trust. So… perhaps it’s not really a good idea to get it tattooed.
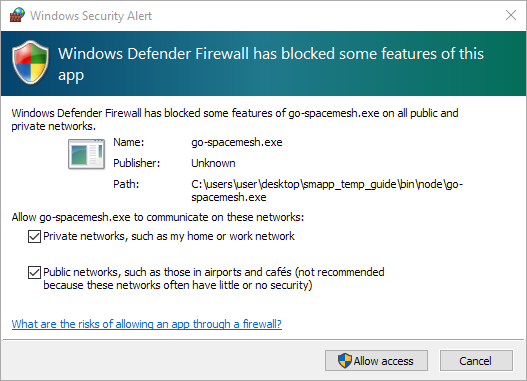 If you are on Windows, you will get a firewall alert; select all options and click “Allow access”.
12 Words
Now that you have chosen a password, SMAPP will take one extra precaution to make it a bit harder for you to lose it: SMAPP will generate 12 random words that represent a copy of your wallet.
These words are a copy of your wallet, not protected by any password.
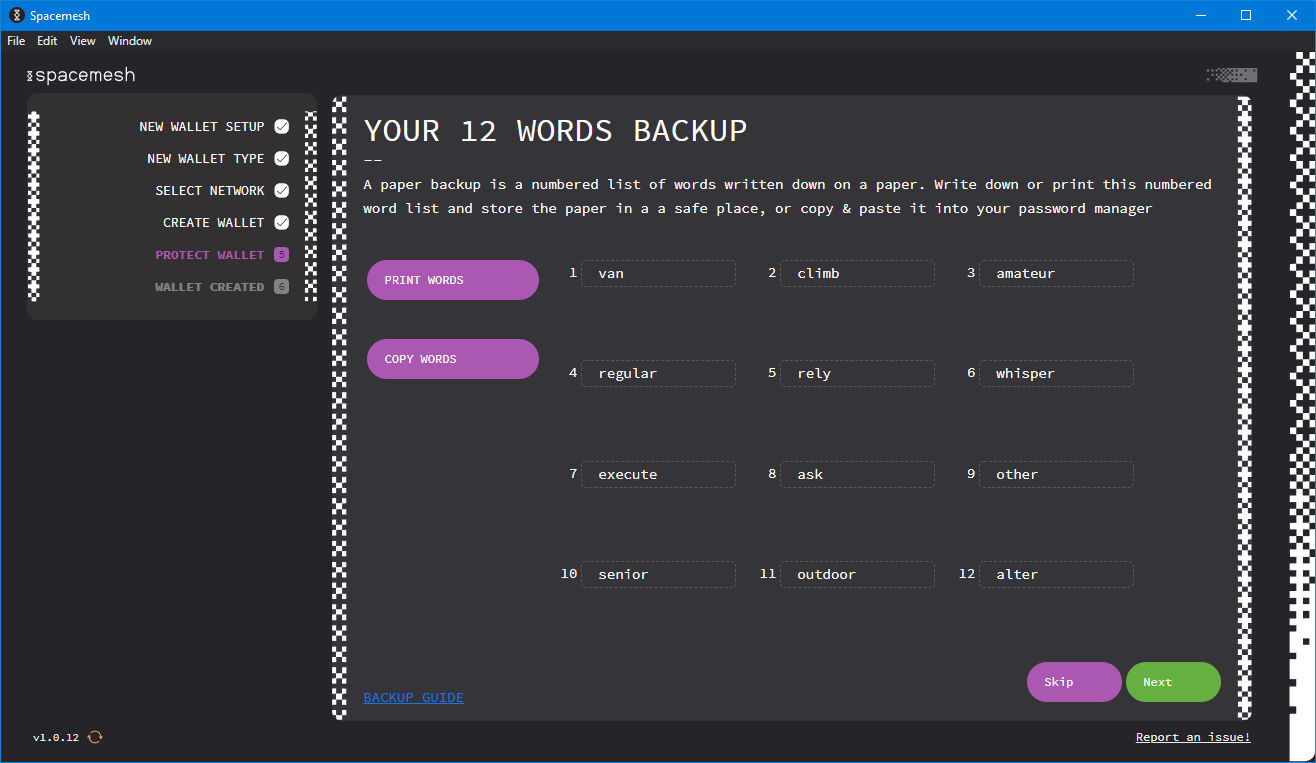 Take note of these 12 random words, treat them as securely as your password.
Basically, if you lose your wallet (your wallet is a file) or if you lose its password, you can always use these 12 random words to recover it.
When you recover a wallet from the 12 random words, SMAPP asks you to set a new password immediately, so these 12 words are not a replacement for your wallet + your password, they are just a safeguard mechanism.
These 12 words contain a copy of you wallet, treat them as securely as your password. That means you shouldn’t reveal them to anybody you don’t trust.
To make sure that you took note of your 12 random words, SMAPP will randomly ask you for 4 of them.
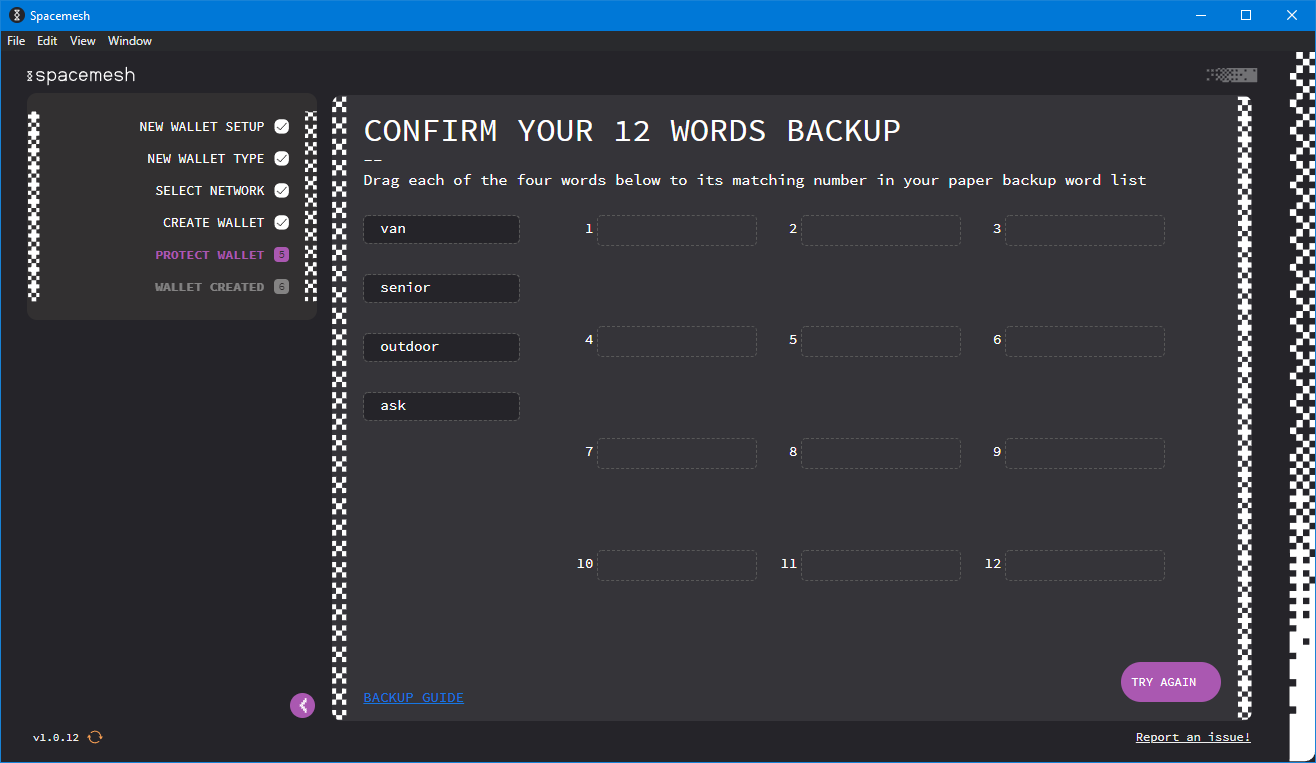 SMAPP will ask you to confirm that you saved your 12 random words.
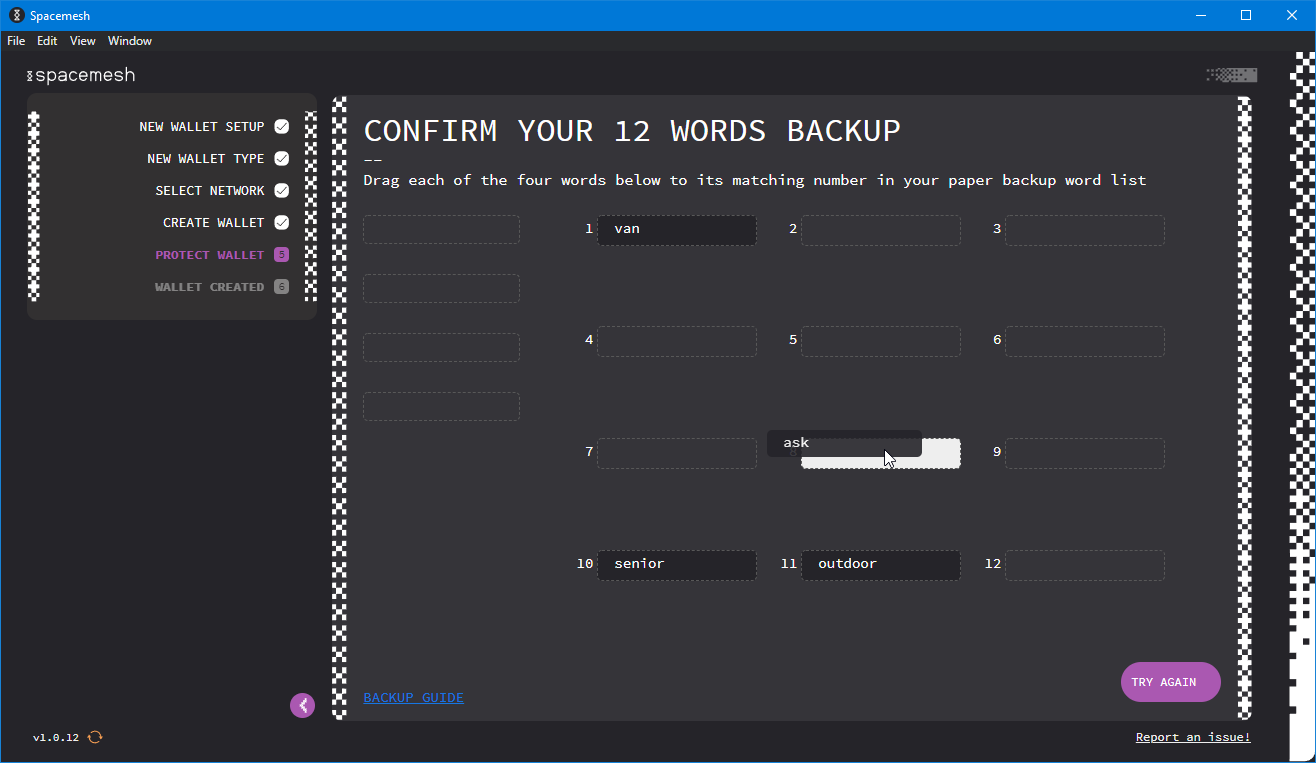 Drag and drop the 4 words on the left to their corresponding slots.
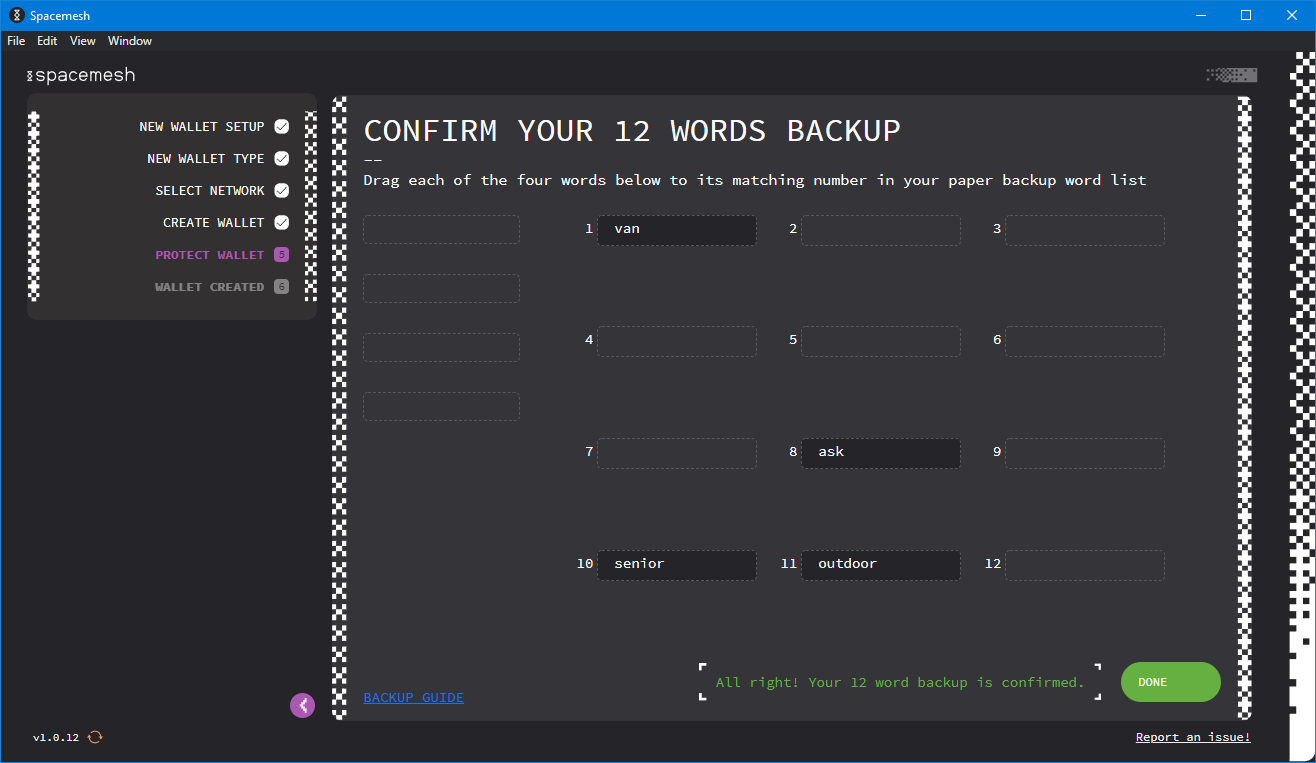 Once you have completed the challenge, click “Done”.
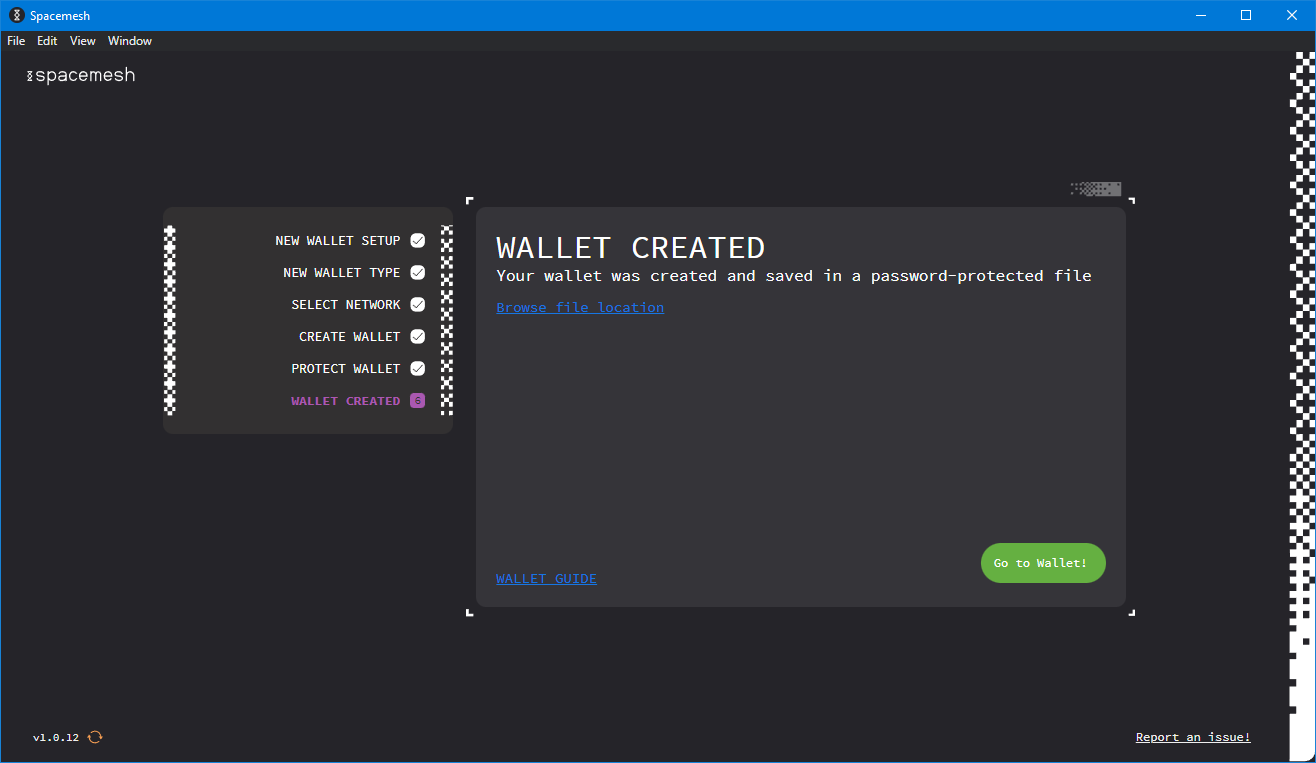 You wallet has now been created, click “Go to Wallet”.
You can now go to your wallet panel, this is where you can check how many Spacemesh coins you have collected.
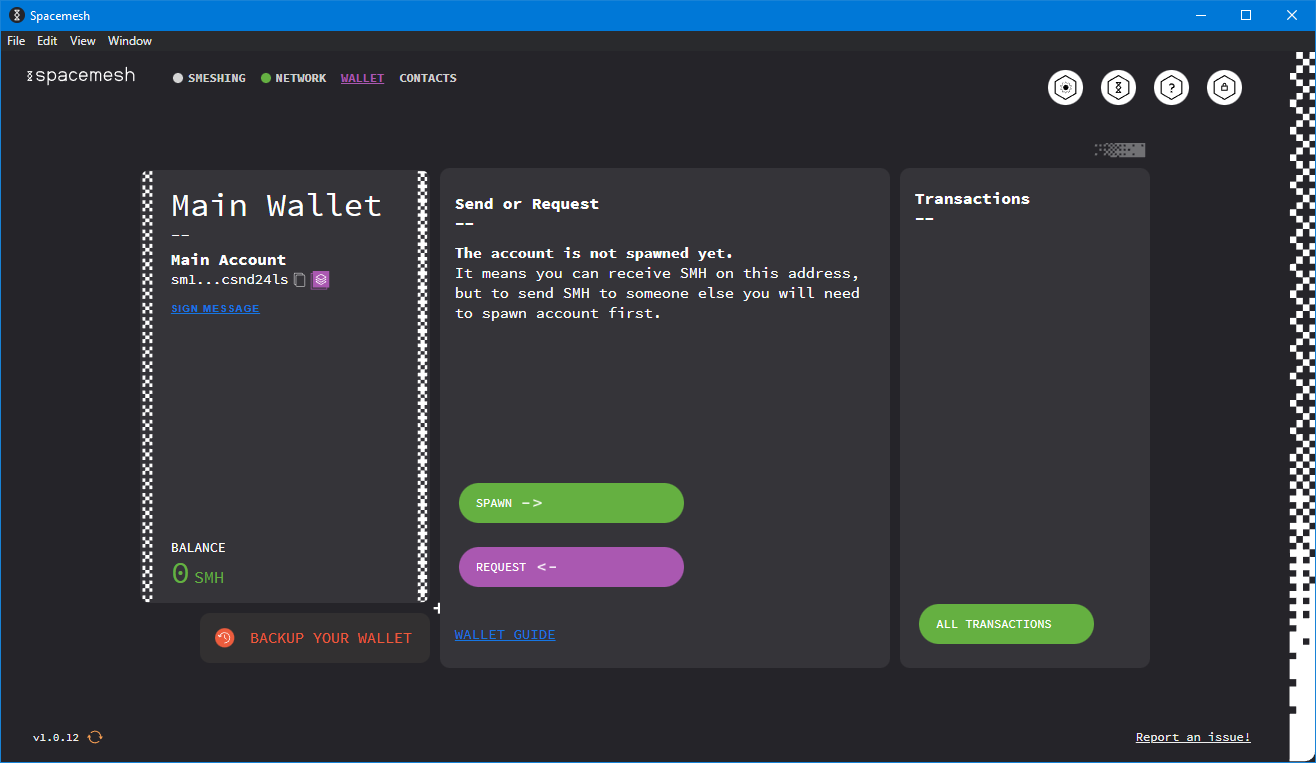 This is the wallet panel.
From this panel you can also transfer coins to other wallets.
Connecting to the Network
SMAPP should automatically connect you to the Spacemesh network.
You can check if anything went wrong from the “Network” tab in the top; there should be a green dot next to it.
If you click it, SMAPP will take you to the network panel, where you can check the status and restart the node if anything went wrong.
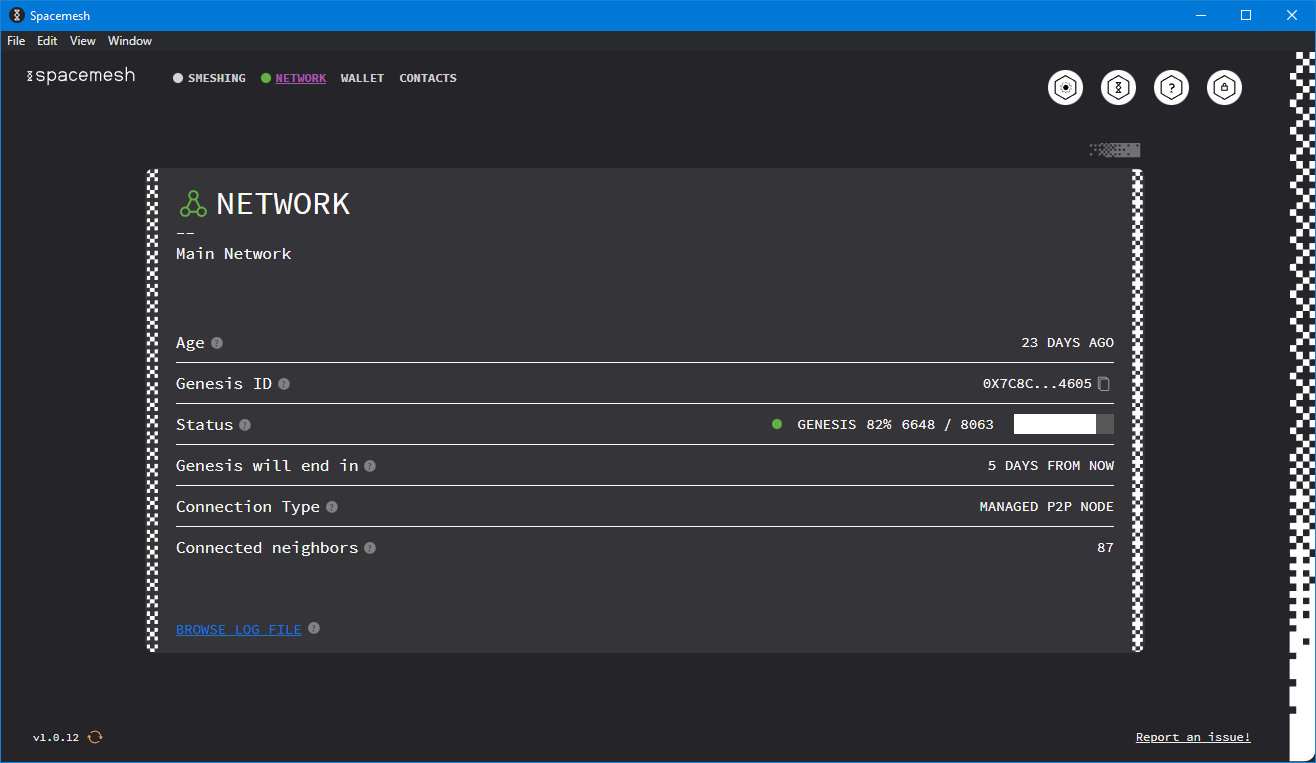 This is the network panel.
Smeshing
Proof of Space
Smeshing is a multi-step process, the first step is called proof-of-space or PoS, and it consists in filling some space with junk data.
Everything comes with a cost, and the cost you pay for smeshing is this junk data, or rather, the price you pay is the price of the disk that provides the space that you use to store this junk data.
Once you are ready to generate the PoST data, click “Smeshing” on the top to go to the smeshing panel.
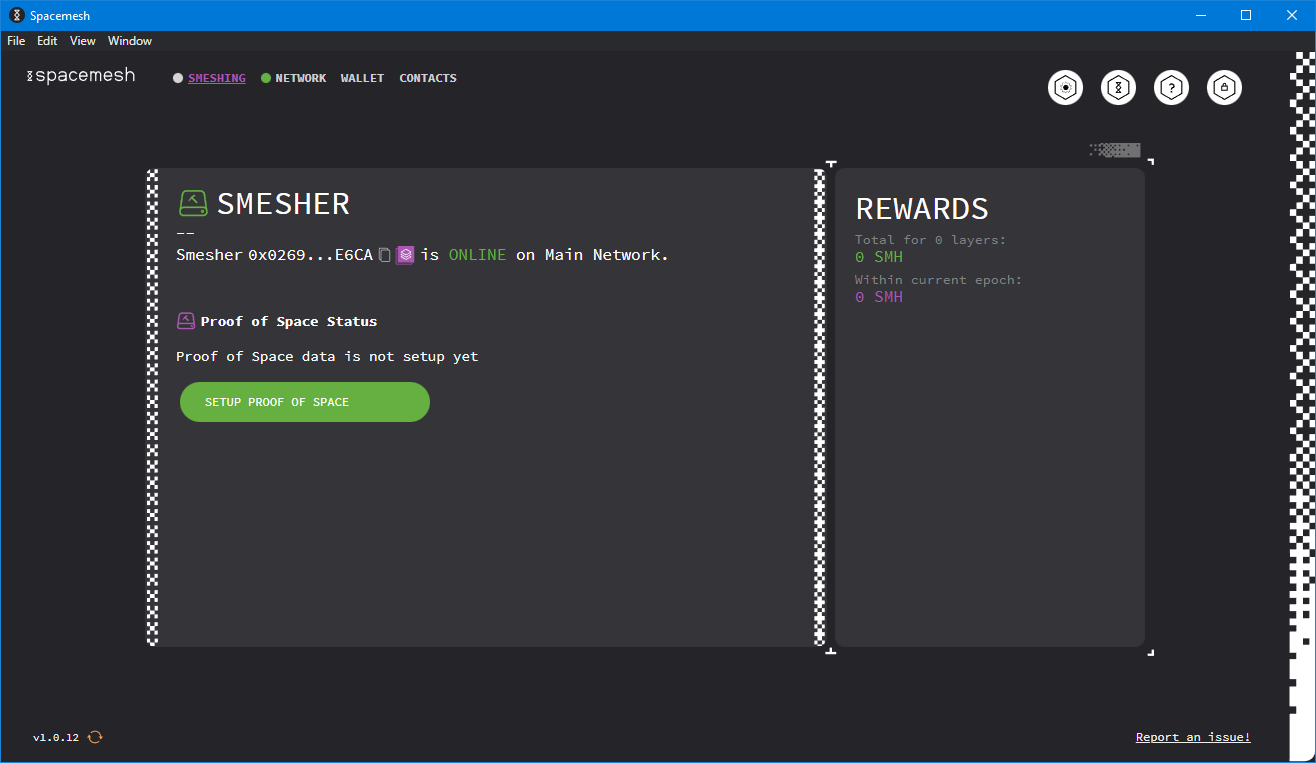 From the smeshing panel, click “Setup Proof of Space”.
 Select the directory where you want to store your data, and click “Next”.
It’s time to pick a path where you want to store your data.
Make sure that you have at least 256 GiB of free space where you want to store your data. 256 GiB is the minimum required to participate as a smesher.
You can keep this data on an external drive or a USB stick if you want, but you have to make sure that both the device and the cable you use to connect it to your PC are of good quality. If the device disconnects, you might lose your rewards.
Generating the PoS data is a one-time operation. Once you have generated it, it’s yours to keep for as long as you want, and you will keep receiving rewards for it and the space you have committed to store it.
Proof of Space-Time
Once you have configured the path where your PoS data is stored, you have to configure how much CPU power you want to allocated to proof-of-space-time or PoST.
Unlike PoS, which is a one-time operation, PoST is an operation that needs to be repeated once every two weeks.
The PoST will generate some random nonces which might or might not turn out to be valid. The only way to know if a nonce is valid is to compare it against all of your PoS data. Basically your computer will have to read all PoS data.
If the nonce turns out to not be valid, your computer will have to generate a new one and try again from the beginning, reading all of your data again.
You can try with more than one nonce at a time, the highest recommended value is 288. This way you will have higher chances of finding at least one valid nonce without having to read all of your data multiple times, but your CPU will be more stressed because it will have to perform more computations.
This operation is called “finding a proof”, it will be performed every 14 days , and it must be performed within 12 hours. If your computer can’t find a proof within 12 hours you won’t be able to participate to the Spacemesh network and you won’t receive any rewards.
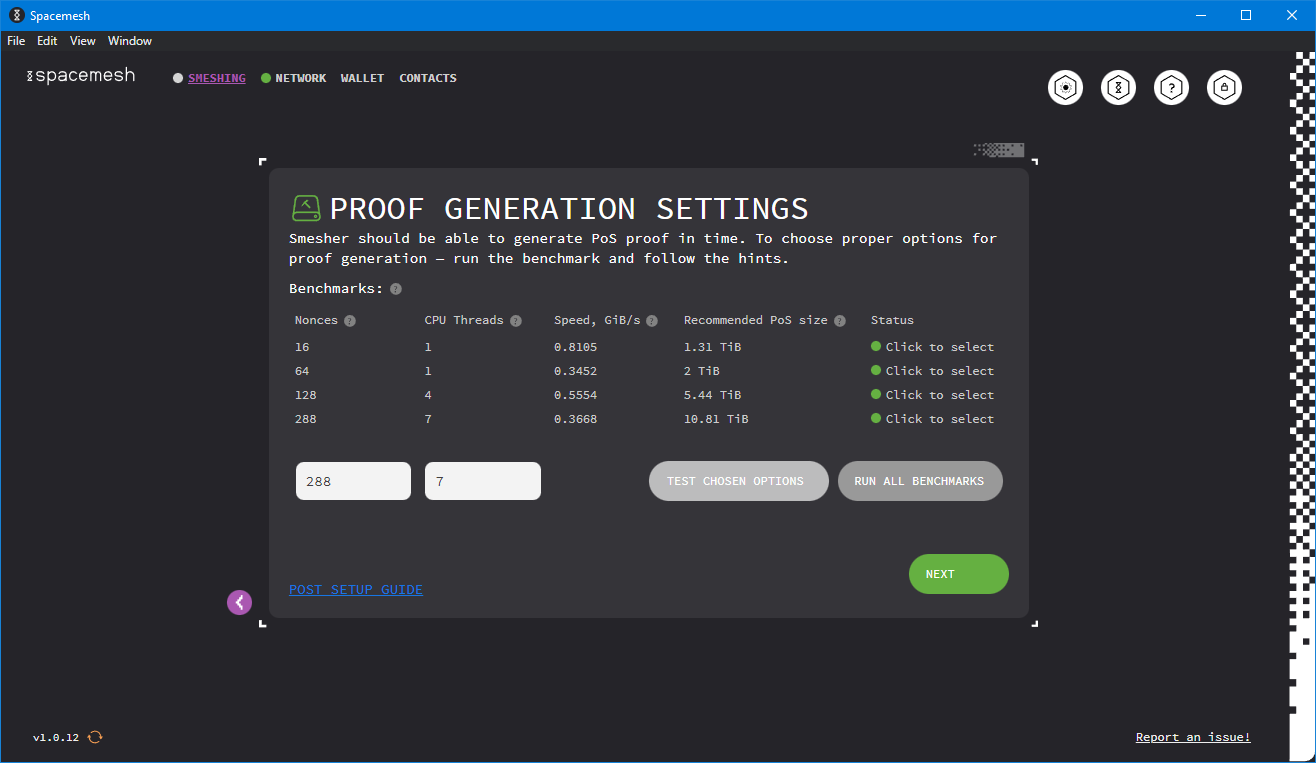 Click “Test chosen Options” and select the one you prefer, then click “Next”.
Choosing the right values is a bit tricky here. The idea is to choose the options that use the least amount of CPU threads and nonces as possible, but high enough to keep either your disk or the CPU usage as high as possible, but always below 100%.
To keep it simple, my personal recommendation is to pick the lowest suggested option where “Recommended PoS Size” is double of the space you want to allocate to smeshing.
As an example, let’s say that you want to allocate 1 TiB to smeshing and your results are like in the previous screenshot, you should choose the second option.
If you instead wanted to allocate only 256 GiB, you should choose the first option.
Remember that if you allocate more than the “Recommended PoS Size”, your computer might not be able to find a proof in enough time, and you might not get any rewards for two weeks.
Size
Now you can tell SMAPP how much space you want to allocate to smeshing.
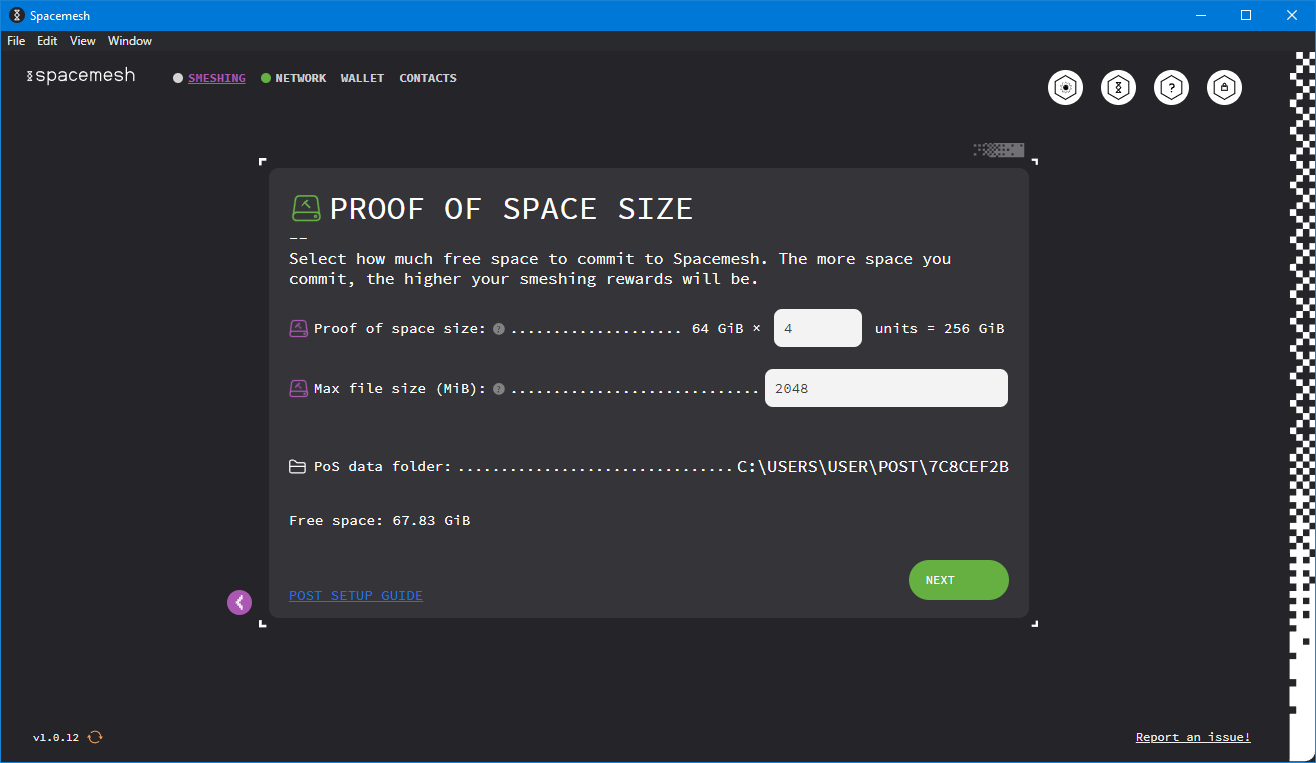 Set the size and click “Next”.
The minimum space you can allocate is 256 GiB, and each unit is 64 GiB, so, assuming you want to allocate 256 GiB, you should allocate 4 units.
4 units × 64 GiB/unit = 256 GiB
8 units × 64 GiB/unit = 512 GiB
16 units × 64 GiB/unit = 1 TiB
etc…
My personal recommendation is to start with 256 GiB to understand how the process works. Unfortunately you can not change this size later, but still, since this operation might take longer than you expect, I would still recommend to start small, and then, eventually, if you feel like you want to, start over and go bigger.
Processor
It’s time for the longest and most energy consuming step in Spacemesh, which luckily only has to be done only once.
Let me repeat it again: you can also do it with a CPU, but it will take a long time and probably waste more electricity than doing it with a gaming GPU. If you don’t have a gaming GPU, you should ask a friend of yours to lend you theirs for a few hours, I have written a step-by-step guide to do smeshing from a friend’s computer.
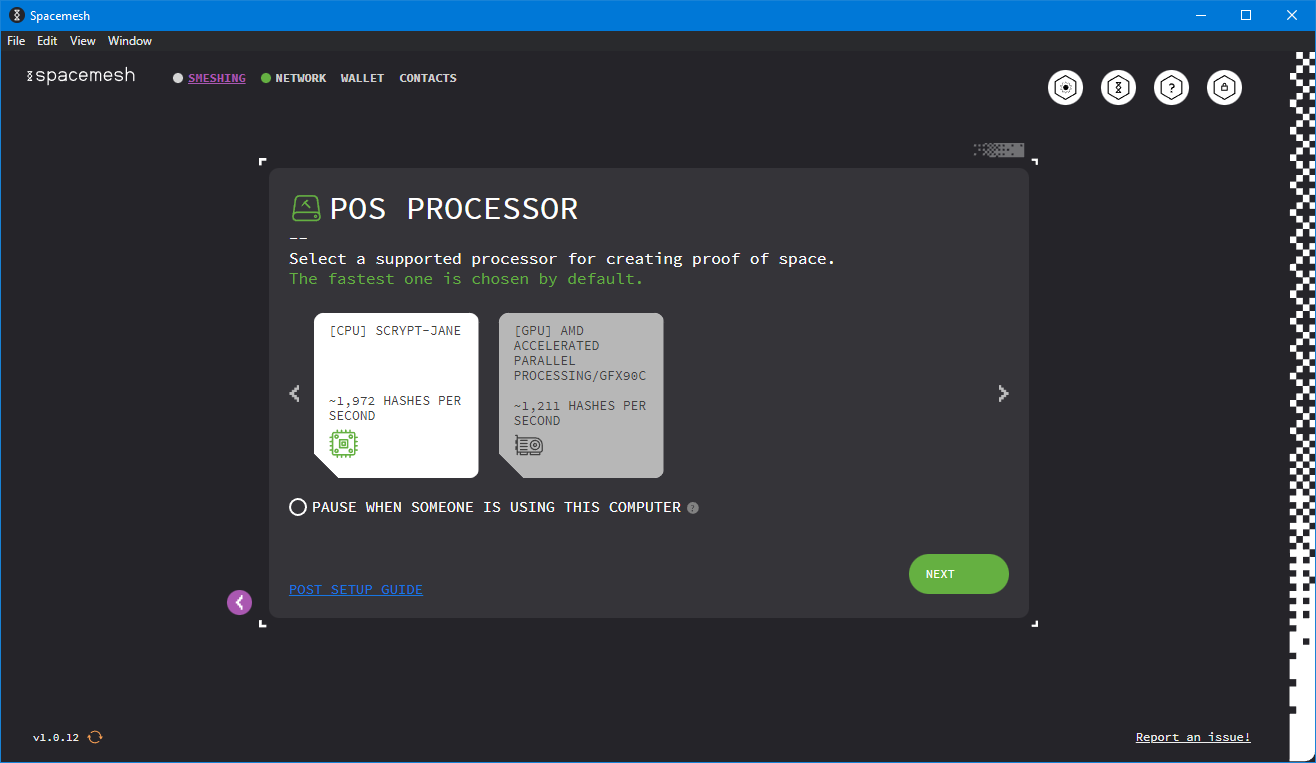 The best option is already selected, just click “Next”.
Rewards
SMAPP will now let you choose the address of the wallet where you want your rewards to be deposited.
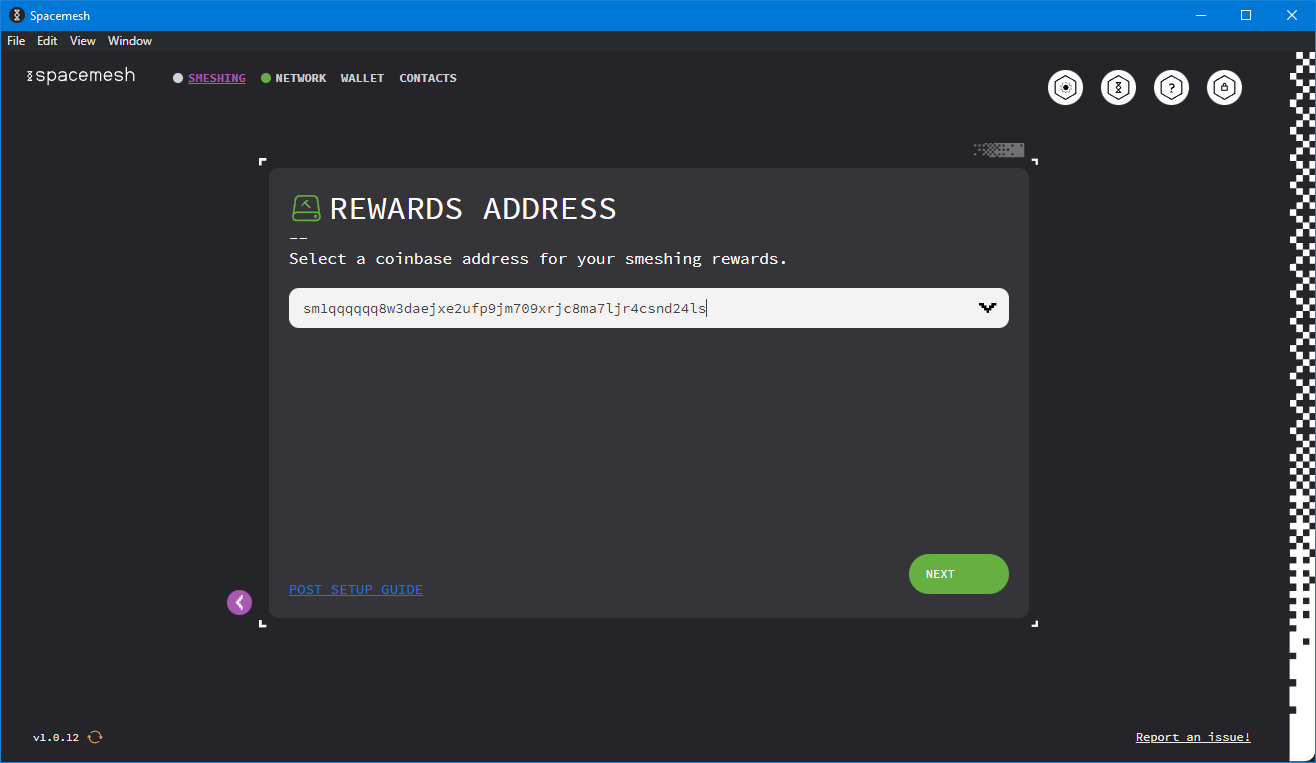 The address of your walled should already be there, just click “Next”.
And at last, it’s time to press the final button!
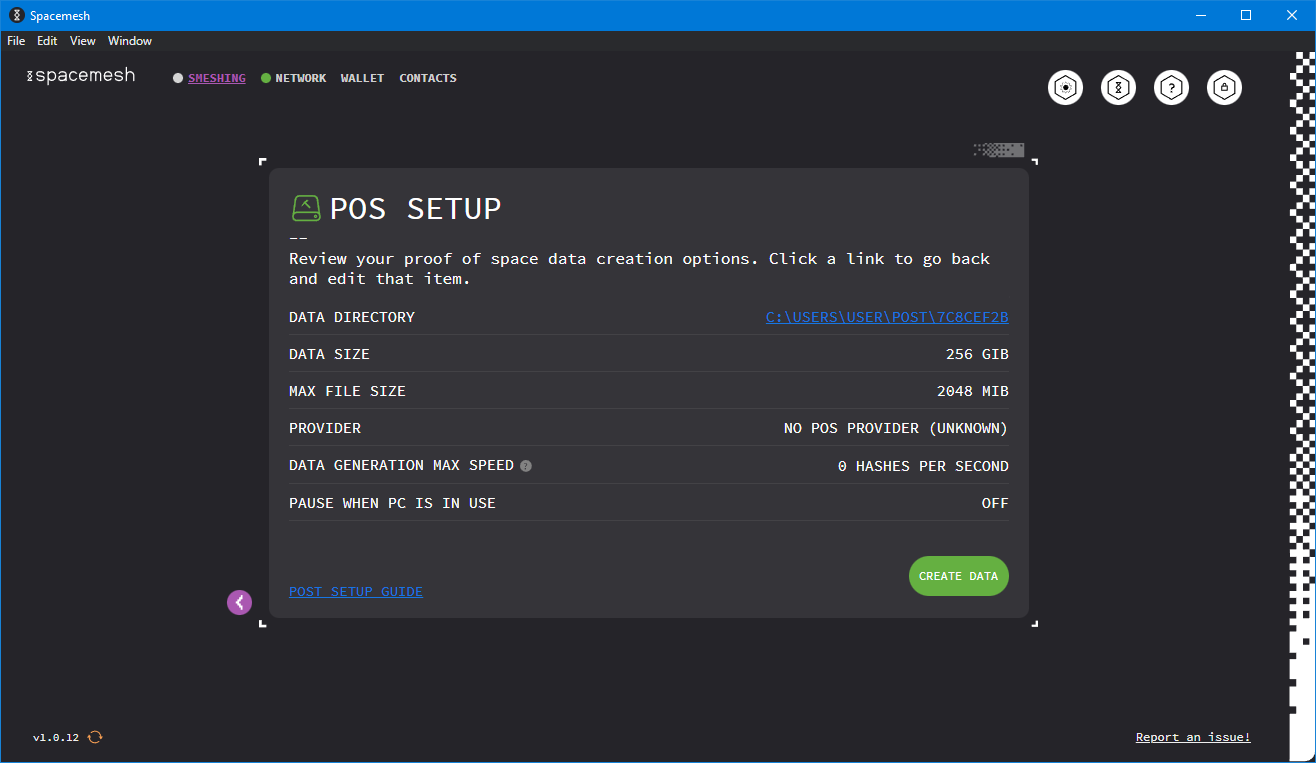 Everything is ready to go, click “Create Data”.
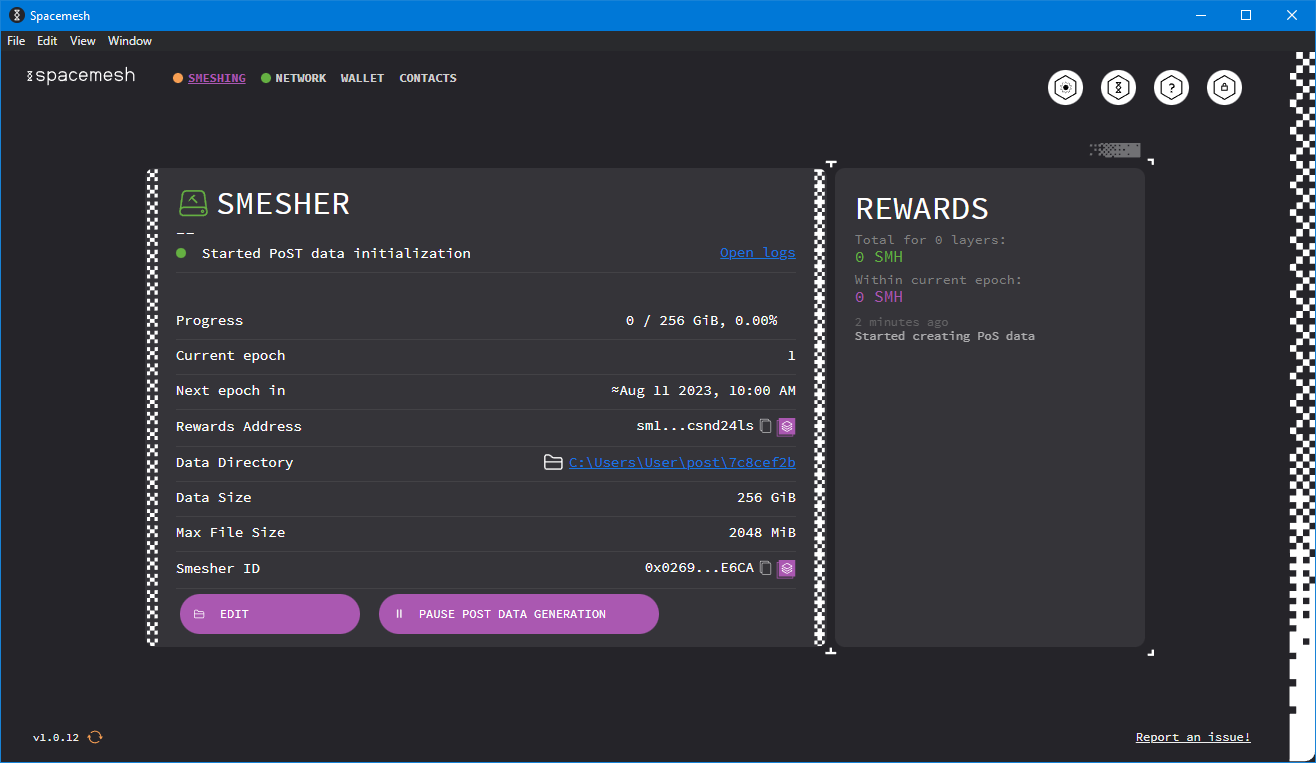 Spacemesh is now generating your PoS data, all you have to do now is wait…
Spacemesh will start filling your space with the PoS data, it will take a few hours to a few days depending on how much space you decided to allocate and how powerful your GPU is.
The community shared a nice spreadsheet to calculate approximately how long your GPU will take to generate this data.
Thanks @dumraden and @cipoint!
Proof of Extended Time
After a few hours Spacemesh should finish generating your data and will automatically proceed to the next step: proof-of-extended-time or PoET, to prove that your space on the disk is still committed to Spacemesh.
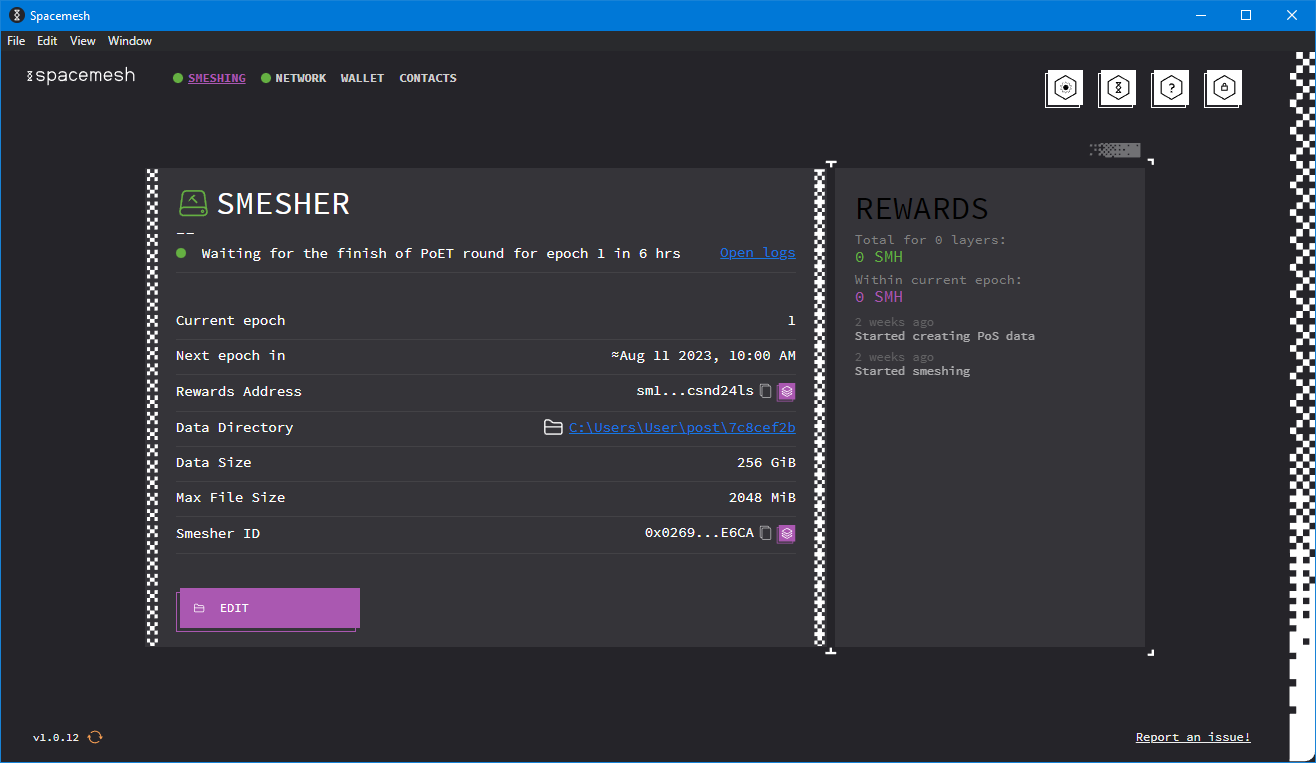 Initialization completed.
You are done. For as long as you keep SMAPP running and you don’t delete your PoS data, you will keep receiving rewards.
You don’t need to pay too much attention to what’s written on this panel. As long as all the dots are green, everything should be alright.
What now?
If you want to know when you will start seeing your first rewards, you can read my article “Spacemesh: Cryptocurrency for the People”.
If you have questions, feel free to join Spacemesh on Discord, you will find smeshers excited to help each other out.
Happy smeshing! 🎉
P.S.: I am one of the many proud smeshers, here’s my wallet’s address if you want to tip me.
sm1qqqqqqzd25drytuyjy3fmyml9td4aja3vp5rztgcrcucu