Getting Started with Git on Windows, the Easy Way
Git is arguably the most important tool for proper software development. Unfortunately, power sometimes comes with complexity, and Git is no exception. This guide aims to give a soft introduction to Git, without explaining what is not fundamental.
![]()
What Is Git?
Git is a version control system, a tool designed to help coordinate work from multiple machines. Version control systems (VCS) are really important when working in team because they permit to work concurrently on a shared codebase. After employing a VCS you will never have to zip up your code to share it with your team. You will never have to wait for your team mates to finish working on a different section of the project before you can proceed.
A VCS might also prove useful to individuals: it is common to make mistakes while programming, sometimes having to scrap everything and restart from the last safe backup. Git keeps a full history of every commit, permitting to revert back to a previous state at any time. This is like a supercharged version of an integrated backup system.

Git, unlike other version control systems, comes with the concept of branching. That means splitting the work between multiple paths. You are implicitly branching whenever you and your team mates work on the same project in parallel from two different machines. After one of the developers finishes working, they might want to share their modifications with the others in the team, which might have been working in parallel on different locations in the same code repository. This is when Git really comes to help with it’s merging system, integrating updates from other developers directly on the local branch. Git also tries to automatically resolve conflicts whenever possible.
Terminology
There are quite a lot of concepts Git has to offer, here are some of the most common. The terms in bold are the ones you will be using more often and you should learn.
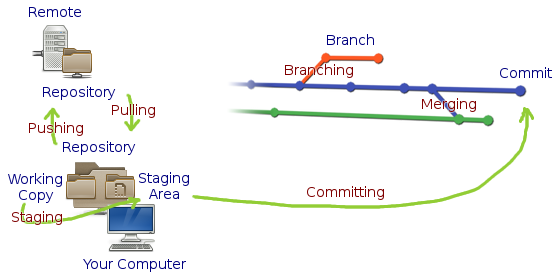
- Repository: contains your work in current version and all of it’s history.
- Remote: a server that hosts your repository.
- Cloning: downloading the copy of a repository from a remote and saving it to your machine.
- Working copy: the version of your work you are currently working on.
- Staging: taking some files from the working copy and copying them to the staging area.
- Staging area: temporary space that holds files ready to be committed.
- Committing: creating a new commit from all staged files, then clearing the staging area.
- Commit: fixed point in history that contains a snapshot of the code in a particular moment in time.
- Fetching: asking a remote if there is something new in it’s repository.
- Checking out: taking the most recent version of a remote repository and integrating it into local.
- Pulling: fetching, then checking out.
- Pushing: sending your local repository to the remote and asking it to merge your history with the remote one.
- Branching: creating a new branch, a divergence from the parent branch in the tree of repository’s history.
- Branch: a particular path on the history tree of a repository. Branches might form automatically when two people work concurrently on the same version of the code.
- Merging: taking a branch and joining all modifications into another one.
Setting Up Git on Windows
We will begin by downloading and installing Git client. It can be found on the official site git-scm.com.
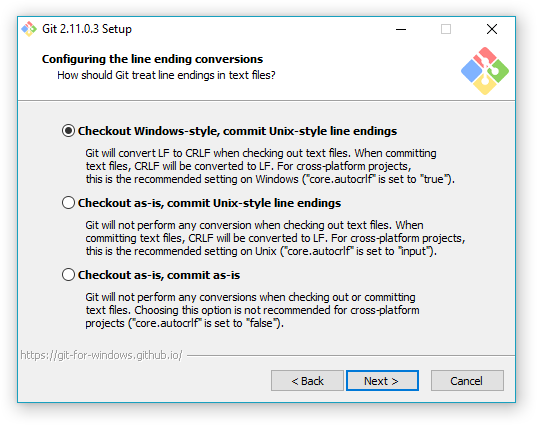
The installer will make a few questions, the first one will be about wether to add Git to Windows PATH. We should do it by answering “Use Git from the Windows Command Prompt”. The second question will be about how to treat line endings, if you use a code editor that doesn’t mess with line endings you can go for “Checkout as-is, commit as-is”, else you should pick “Checkout Windows-style, commit Unix-style line endings” (go for this one if unsure). Leave everything else as default.
Even though Git is a command line tool, in this tutorial I’m simplifying things a bit as we are going to use a graphic interface. You can look for the best user interface client from GUI Clients section on the official site. You can also go without an interface and live with the command line, though I discourage taking this route if you never worked with a VCS before.
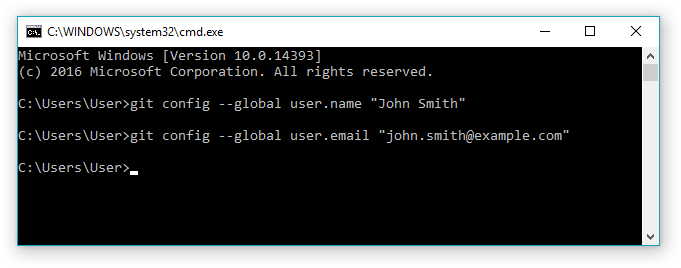
Let’s configure our user, this is the only operation we will be doing on the command line, it has to be done only once. The standard is to insert your real name and e-mail here, but be advised that this information will be visible to everyone with access to your repositories. They will be embedded in every commit you publish.
1
2
git config --global user.name "John Smith"
git config --global user.email "john.smith@example.com"
My explanations from now on will refer to the interface of SourceTree (which requires a free Atlassian account), but the concepts should be valid everywhere. Even though SourceTree is designed to work with BitBucket, it works fine with other Git hosting services as well. I suggest installing a user interface client before proceeding any further.
Last step is the creation and configuration of an account on a free Git hosting service. You can pick among many, some of the most famous include: GitHub, which provides free hosting for open-source projects; BitBucket, which also includes closed-source projects hosting in it’s free plan, for up to 5 users; and GitLab which offers free hosting to closed-source projects without any sensible limit.
Git connects through SSH, you have to create an asymmetric key pair and share your public key with the service that hosts your repositories. Your SSH client must be configured to use the private key you generated; if you use SourceTree as a graphic interface client, it should ask for the key on it’s first launch.
Hint: you can check my tutorial on how to generate an RSA key pair if you need one.
How Does Git Work?
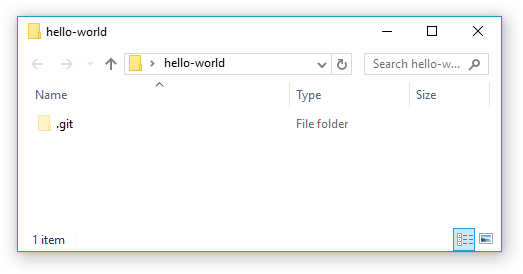
The first operation with Git is to create a new repository. You can either use your client’s graphic interface, or run git init command from your project’s folder.
The empty repository will only consist of a .git folder. This folder contains all the commits that anyone makes (the history of your repository).
You should immediately add a remote origin. This is not a fundamental operation if you work on your own, but it provides a backup copy of your work. Note that you must have created your repository on the Git hosting service of your choice, you can usually do this though a web interface.
Graphical clients usually ask you to add a remote when you create a new repository. If you want to do this operation from the command line, you should type something like the following.
1
git remote add origin git@github.com:john-smith/hello-world.git
If the service you are using supports it, you can also use HTTPS authentication instead of SSH by replacing your remote repository’s URL with something like https://github.com/john-smith/hello-world.git. You won’t need a key to authenticate this way, you will have to insert your registration credentials instead.
Remember: a remote is a server that stores a copy of your repository. You need a remote if you want to share your work with other people.
And you are done: your basic repository configuration is completed. You can already start working on your code; proceed as you would in a normal file-system. Keep working until you are satisfied and you want to permanently add a copy of current project’s state to the history.
Note: before starting to work, always fetch (use
git fetch) to check if another member of the team committed something new. If this is the case you can integrate their modifications by pulling (withgit pullcommand).
When satisfied, copy your modifications to the staging area from the working copy. This operation can be performed from your graphical client or by running git add --all command.
Tip: if you are a command-liner, at any time you can use
git statuscommand to check what is currently going on. Graphical clients should always give you an insight on everything.
After staging your modifications, you can create a new commit (git commit command if using the terminal). You will be asked to add a message; describe what you have done since last commit. If this is the first time you commit something, you can use “Initial commit” as a message.
Tip: it is a good idea to commit frequently. It is good practice to create a new commit every time you complete a micro-task.
At the end of the day, or whenever you want to share your progress with your team, you can push your local commits to the remote (git push command). You will begin uploading your modifications to the server.
This process will be totally automatic if nobody committed anything since you started working. In case someone else pushed before you, you will have to either create a new branch or merge their modifications into your one. Git tries it’s best to perform this operation automatically, but if it fails, it helps you integrate remote modifications by highlighting the conflicted sections in your code. Fix the conflicted files, ensure the project still compiles and behaves as expected, then stage, commit and push again.
Note: if your client fails to push, try pulling first.
And you are done. This is all you need to know to get started with Git.
Other Useful Things
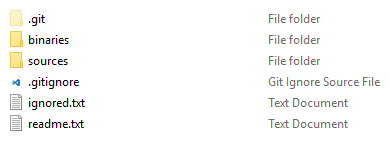
It is a good idea to avoid pushing “generated resources” to Git repositories. This means you should avoid pushing binaries and compiled files to the repository. You can selectively ignore files and folders by creating a .gitignore file. Take inspiration from the following example.
1
2
3
4
# .gitignore
/binaries
/temp
/ignored.txt
Note: visit GitHub Help pages if you want to read more about ignoring files.